
Drip Irrigation for Raised Garden Beds: The Complete Guide
The self-watering raised garden bed, or drip irrigation for raised beds, is a simple and efficient way to water your plants without all the headaches. Plan out and build your raised garden bed irrigation system so you can water your plants efficiently and effectively. Trust us when we say this beats hand watering.
Table of Contents
How to Setup Drip Irrigation for Raised Beds
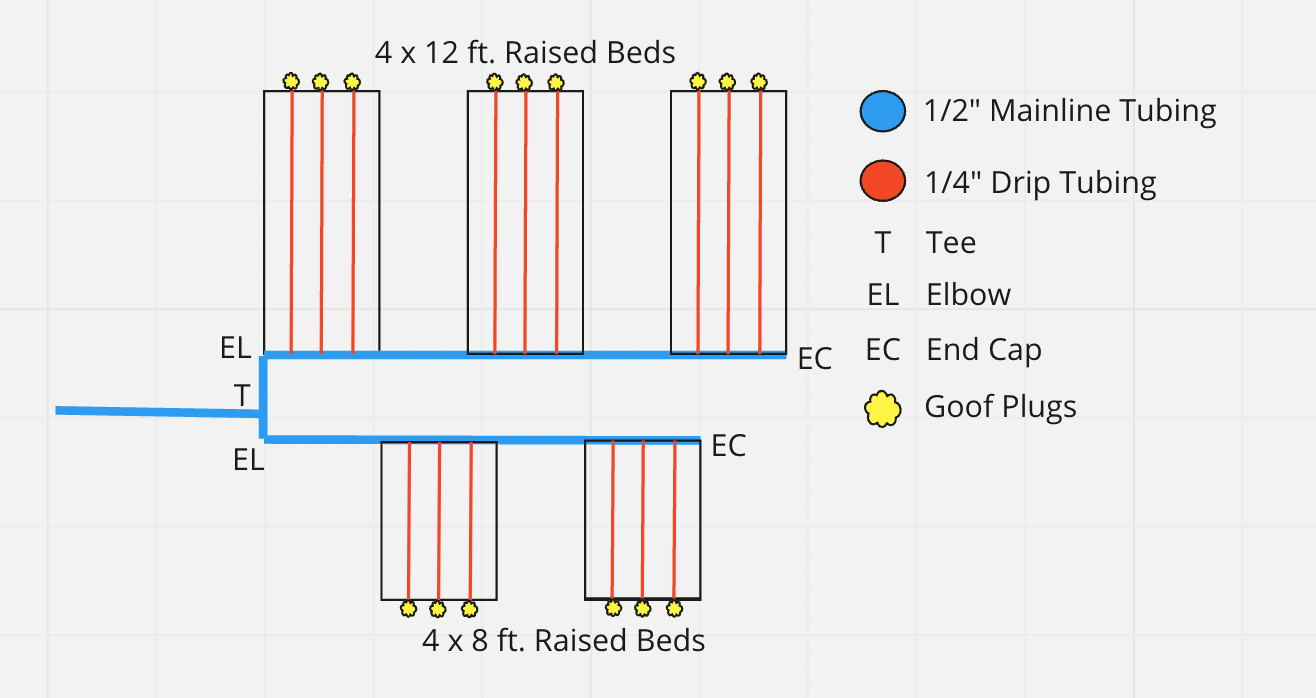
Note: This is NOT an exact diagram. Please do not follow this in your plans. It's meant to be a rough idea for how you can sketch out your system.
You might think buying the drip irrigation system is the first step, but actually, first, you need a plan. If you have ten or more raised beds, you want to make sure you have the right amount of equipment to get the job done.
RELATED: What is drip irrigation?
Nothing worse than starting and installing drip irrigation systems you can't finish. Plan it out and get it right. Let us repeat: plan it out and get it right. You will thank us later when you have a wonderful self watering irrigation system for your raised garden beds.
Sketch Out the Design
Drip irrigation systems for raised beds are a bit more complicated than drip irrigation for potted plants. That's because when you build out raised beds, you can't move them around freely and easily like a potted plant.
Planning is key because raised beds are relatively permanent structures in your garden. Of course, if you buy those metal, moveable raised beds, they are a lot more mobile but even so. You really don't want to have to move and rebuild the system (if you can get away with it).
Most people fall into two categories when it comes to drip irrigation:
- they either have a garden already built
- they want to build one from scratch
Either way, you should sketch out what you have or what you want to have so that you can know for certain things like how much length of tubing you need, how many emitters, where to run the lines, etc.
This is a simple but critical part of the process if you want things to be efficient and done right. Take the time to plant it out now and you won't regret it. You can do this in a notepad or a napkin - jut use something to give you an idea of the equipment you need and the direction you want to take with the garden.
Grab a notebook with graph paper. Decide what scale you want to use (typically 1 box = 1 ft). Start drawing out what you want for a new drip system or what you already have in your garden. Once you have the beds drawn own, grab a different pen and start drawing the mainline tubing.
- Use a Cross (+) when you need to signify four tubings that goes in four different directions at once.
- And a Tee (T) for tubing that goes in three different directions at once.
- Elbow fittings (L) for all 90 degree turns. Each raised bed needs a minimum of two elbows.
- End clamps (EC) will be at the end of each mainline
- Goof plugs (G) to close off any drip line
Once you have the tubing all drawn up, you would then count the number of squares to determine how many feet of 1/2" mainline tubing you need for the design.
You then need to draw the drip line tubing into the garden beds with another pen. The size of the bed will determine the rows of tubing. Generally speaking, 4 x 12-foot beds need about three lines of drip tubing. You are looking at 36' for a 12' bed and 24' for an 8' bed.
Once you are confident you have the sketch right, then go ahead an jot down the amount of mainline tubing you'll need, the amount of drip tubing you need, and the number of drip tape fittings, end caps and goof plugs you need, too. That way, when you build the system, you have what you need from the start.
To be safe, always buy or have a few more than you planned in case anything happens. Now, we calculated the max flow rate of your system before, but now we have to calculate what your system actually needs.
If the GPH of your main water source is 200 GPH, then your system needs to be less than 200 GPH to ensure each emitter gets the right amount of water.
Water Source Flow Rate
Before you start buying equipment, you want to test the flow rate of your water source. This will tell you how many emitters you can supply out in the garden. If you're emitters run at 200 GPH but your pressure source only supplies 100 GPH, you will run into watering issues. The emitter's total water pressure should be far lower than your water source.
The best way to test this out is to use a timer and a two-gallon bucket of water. Open the water head all the way, and see how long it takes to fill the bucket the two gallons. Literally, count out the seconds it takes for the bucket to fill.
From there, you can use this calculator to help you figure out what GPH flow rate you are running at.
Calculating Flow Rate
Gallons / Seconds to Fill x 60 for gallons per minute and x 60 for gallons per hour = GPH
Supplies
Most drip irrigation kits have everything you need and more for majority of gardens. However, refer back to the sketch of your drip system and match it up with the kit to ensure it has the necessary equipment. Here's a list of some of the supplies you will need for your drip system:
- Timer - this isn't needed, but we are lazy and always recommend buying one. Our designs always include a timer.
- Header Assembly
- 1/2" Mainline tubing
- 1/4" Drip Lines
- Endcaps
- Elbows
- Tees and other drip irrigation fittings
- Button Drippers
- Stabilizer stakes
- J-stakes (holds down mainline tubing)
- Coupling Valves
- Bucket (1 or 2 gallons)
Head Assembly Preparation
We've covered head assemblies before, but we will cover it again. A head assembly consists of four things:
- Backflow preventer
- Filter
- Pressure regulator
- Adapter
Pressure regulators are critical in a drip irrigation assembly. It's one of those drip irrigation tips that people think they can ignore. Don't do it. You will ruin your system.
Optional (and recommended) is a drip irrigation timer. We like these because we want to automate watering as much as possible, as watering is one of the most time-consuming and least enjoyable parts of gardening. Prefer putting plants into the soil!
The timer is important too because it is the only piece of equipment rated for constant water pressure. The smaller parts can't handle the water pressure from your water source as well and the parts will either fail or malfunction over time.
When putting the head assembly onto your water supply, just do finger tight with may a 1/4" afterward—no need to go crazy and try to jam them on there. No tools required.
- Timer
- Backflow preventer
- Filter
- Pressure Regulator
- Hose by Tubing Adapter (can be straight or elbow adapter)
Installing Drip Irrigation Mainline Tubing (1/2") and Beyond
A lot of this section is going to be very subjective. How you set up your garden won't be the same way another person sets up there. This will come down to your garden and, most of all, your sketch.
Cut your mainline tubing and insert elbows, Ts, and crosses as needed. Refer to the sketch, and the environment you are in as needed. When you get tubing close to the bed, consider securing it to the wooden frame with a clamp. This isn't required but it does keep everything tight and organized.
Coupling Valves
We said this in our other post on drip irrigation tips, but each bed should really have its own coupling valve. Why? Because then you have the ability to turn the water on an off. If you harvest one plant before another then you can turn the water supply off easy just by turning the valve. Must have.
Securing Mainline Tubing To The Garden Beds
Now that you have built your tubing along the upper edge of your bed, you can close off the end of the line with an end cap. From there, you need to poke three holes into the line, as you sketched out earlier. The easiest way to do that is with a hole punch.
Don't sweat the hole punch; it's going to make putting in mainline fittings that much easier. But if you make a mistake, don't worry. That's why we have goof plugs. They can be used to end drip lines but also to fix mistakes.
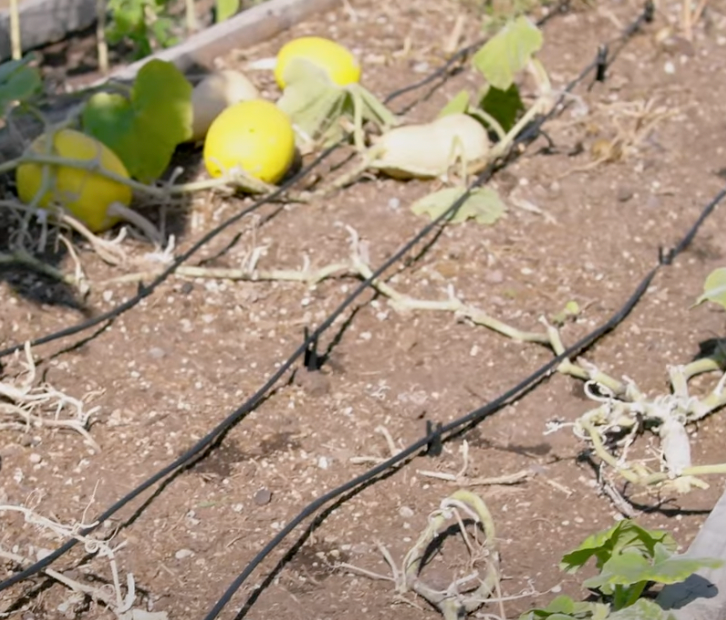
Installing the 1/4" Drip Irrigation Tubing
Now you should have the holes already punched in your mainline tubing. If not, see the paragraph before. If you already have plants in your raised bed, you may want to run your tubing along the line of the plants.
Put a 1/4" coupler into the hole punch. This is how you connect drip tubing to the mainline tubing. The first 12" of the tubing won't have emitters. That's the side you put closest to the wooden bed.
Then, if you already have plants, just try to get the emitters as close as possible to the plants. Luckily, the tubing is flexible so you can snake it through your plants or crops.
RELATED: How To Install Drip Irrigation: The Complete Guide
Run it to the edge of the bed, and cut the line off at the end. Stake the tubing into the ground with 1/4" J-Stakes. Close off the end of the tubing with a goof plug.
Note: Some people switch it up and run drip tape on top of some of their garden beds. This is definitely doable but it comes down to what plants you are planting. If you don't know the difference between drip line vs drip tape, be sure to read our guide.
Adding Potted Plants on the Side
Say you have some potted plants off to the side of the raised bed. No problem.
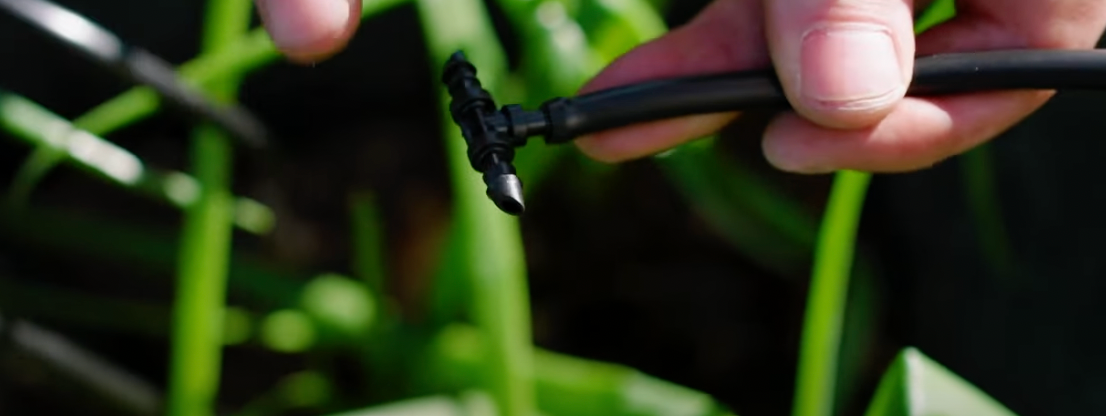
What you need to do is grab your 1/4" tubing. Regular, blank tubing - not the tubing with emitters. Poke a hole into the mainline tubing (assuming its closest to the plant) and run the tubing out to the potted plant.
At the end of the tubing, there will be a button dripper into the plant. Or, you can hook it to a T, allowing you to add two button drippers to the plant. Just depends on the potted plant. Each dripper will rest on a stabilizer stake just about the root system of the plants. Try to avoid putting one over the foliage of the plant.
However large the potted plant is on the side of the raised bed will determine how much tubing and drippers you need.Again this is hyper-specific to your garden, and you may not even have this issue.
Repeat for Each Raised Bed
Okay, now that we have gotten one raised bed out of the way, you would then repeat this process for the other raised beds. The more beds you have, the more work you'll need to do.
The important thing to remember here is maybe you don't have all the beds you want built up yet. No problem. But keep the sketch you had in mind.
You can T off the mainline tubing accordingly and into coupling valves so that you can turn off the water for raised garden beds that aren't yet established. If you do this, you can turn the water off and it won't affect the rest of the garden beds.
System Flush
Flushing is an important step you don't want to skip. You may have gotten some dirt or debris into the system while you were installing it so nows the time to clear the line. All you have to do is take off the end caps that were attached to your mainline tubing and run the water for a minute or so.
First Water Cycle
Now's the time to test the system. When you run the first water cycle, walk the line to check for leaks. The goal here is to make sure ONLY the drippers are dripping water, and not these:
- Fittings
- Joints
- Connectors
- Emitters
Walk the line to see if your drip irrigation system works. If any problems come up, now is the time to troubleshoot them. Usually, leaks just mean you attached the tubing slightly or something needs to be tightened, like an end cap.
If some of the emitters aren't emitting water, you may have messed up your water pressure calculation (we hope not). Be sure to check for inconsistent watering.
Sweet New Earth's Final Say on Raised Bed Drip Irrigation Systems
As you all know by now, we are huge fans of drip irrigation systems. We want nothing to do with guessing and any extra effort it takes to water plants, whether it be potted plants, raised beds or whatever.
Installing drip irrigation for raised beds is a little bit more difficult than for potted plants. Take the proper time to plan out your drip system, and get the right watering system for those raised garden beds.
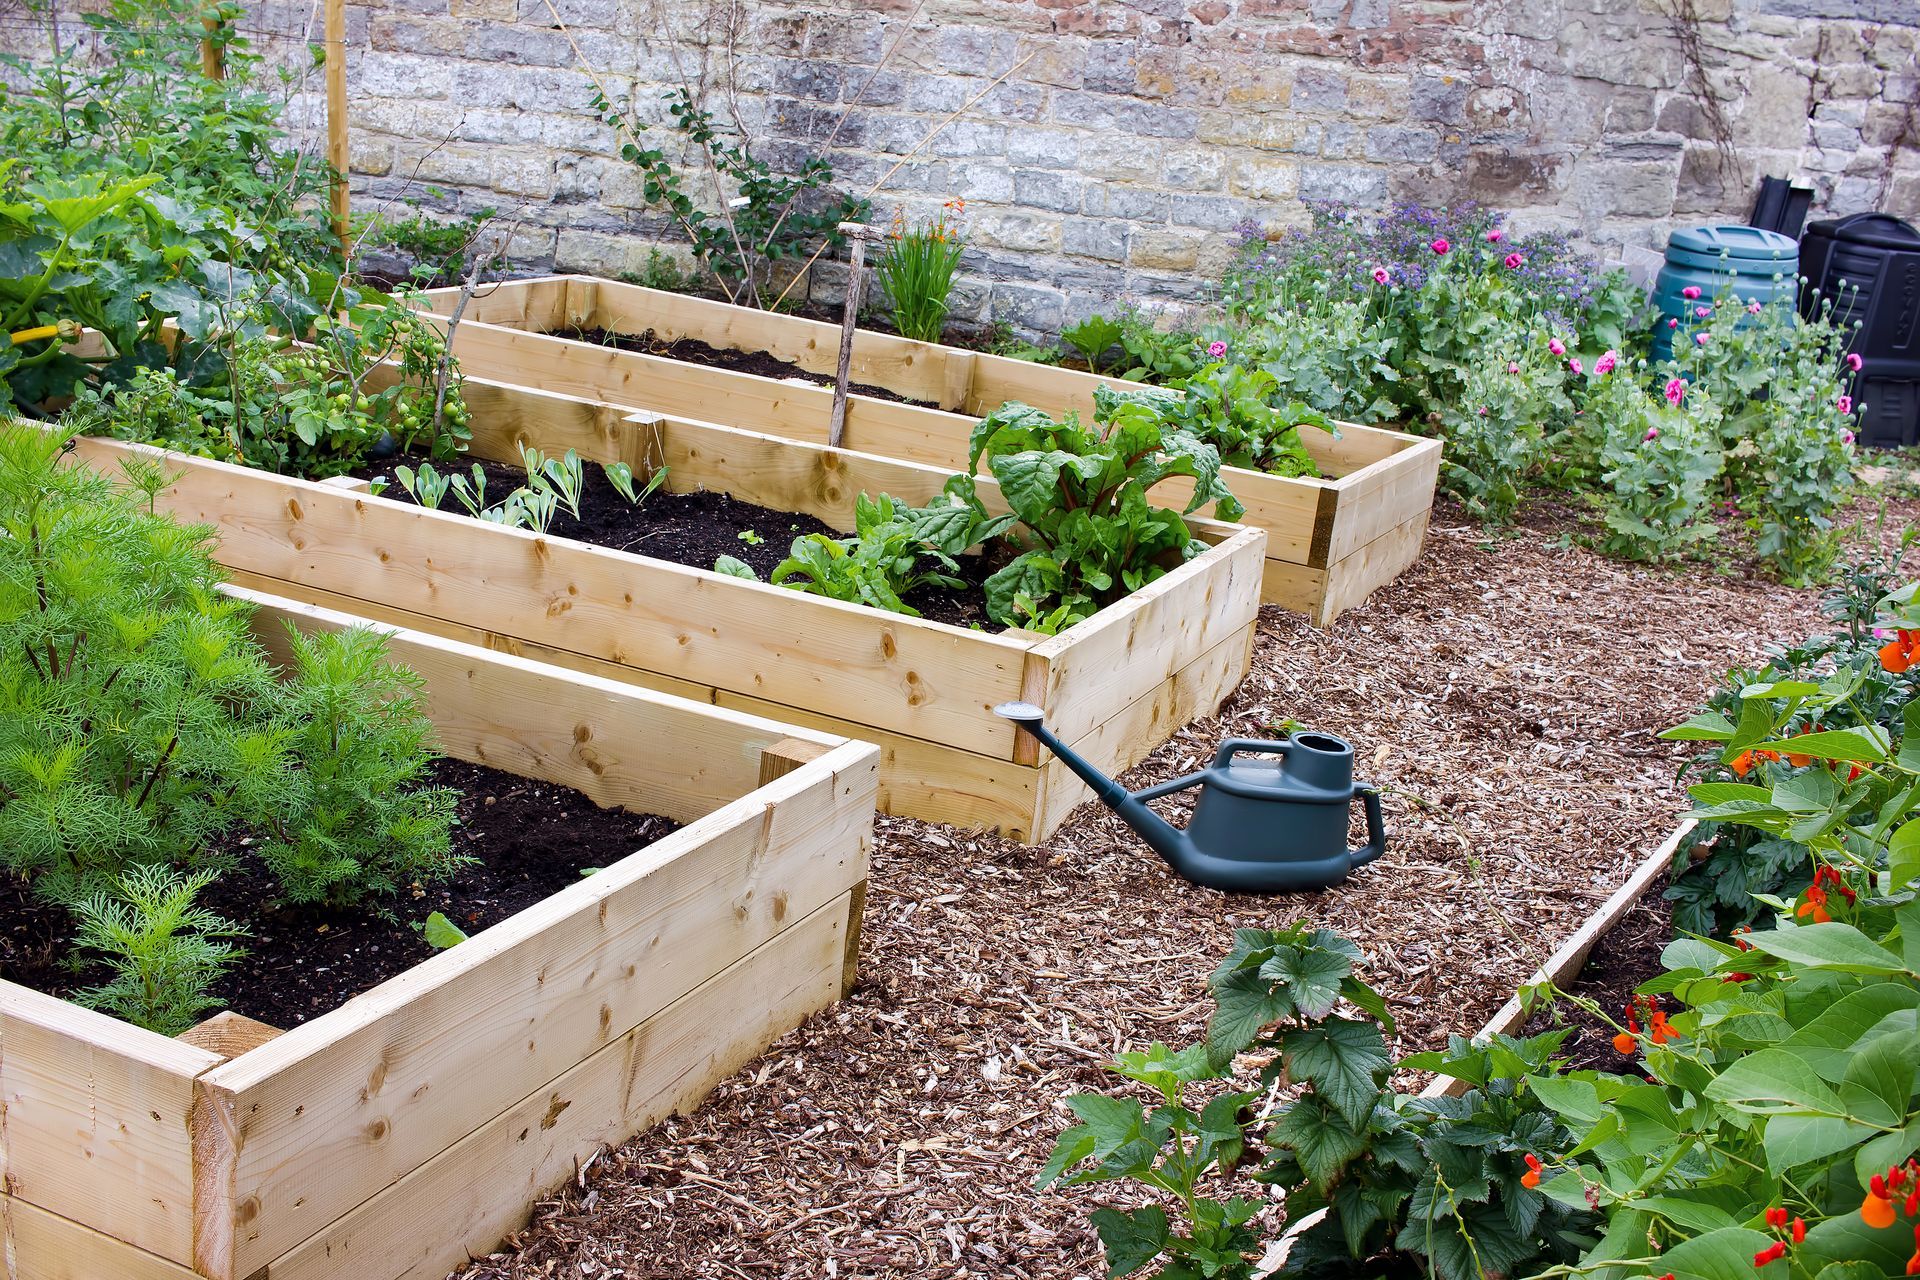
Raised bed gardening is a blast! It has that true gardening feel to it which you don't often feel with potted plants.
FAQs

Carl Anderson
Carl Anderson is an avid outdoorsman with a keen interest in writing about and reviewing tools. He has over 20 years of writing experience and the only time he isn't feverishly typing away at his computer is when he's outside in nature working on his projects. You can learn more about him here.
Join our community!
Join to receive guides, insights, and the latest gardening deals!