
Replacing A Chainsaw Chain: A Step-By-Step Guide
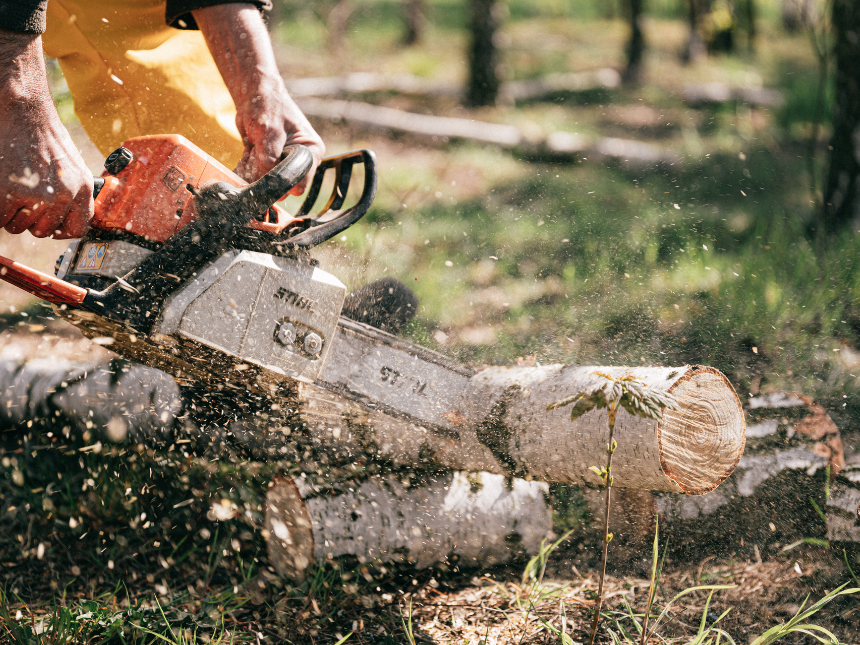
So you want to change the chain on a chainsaw. Well, before we start, let's get this straight. Changing a chainsaw blade is the same thing as changing a chainsaw chain. Most people don't realize that a chainsaw "blade" is actually two pieces: the chainsaw chain bar and the chainsaw chain put together. So with that out of the way, let's get to changing a chainsaw chain.
Table of Contents
How To Replace A Chainsaw Chain: Step By Step
The chain is just one of the many parts of a chainsaw but it's also what makes the chainsaw... a chainsaw. Without it, you have nothing but a piece of metal. If it's worn out, rusty or just plain not cutting well, it's time to change it out. Keep reading to learn how.
Equipment Needed
Gloves
Sounds obvious, but you always want to wear gloves when changing chainsaw chains. The new blade will be extremely sharp, so you need to protect your hands.
Wrench
You know how wrenching goes. Match up the right wrench to the bolt on the faceplate and you are good to go.
New Chain
This will be specific to the chainsaw. But obviously, you are here to change the chainsaw blade so there is a good chance you already have one purchased. If not, just google the type of chainsaw and match up the model and chain to what you have for your chainsaw. Refer to the user manual for specifics.
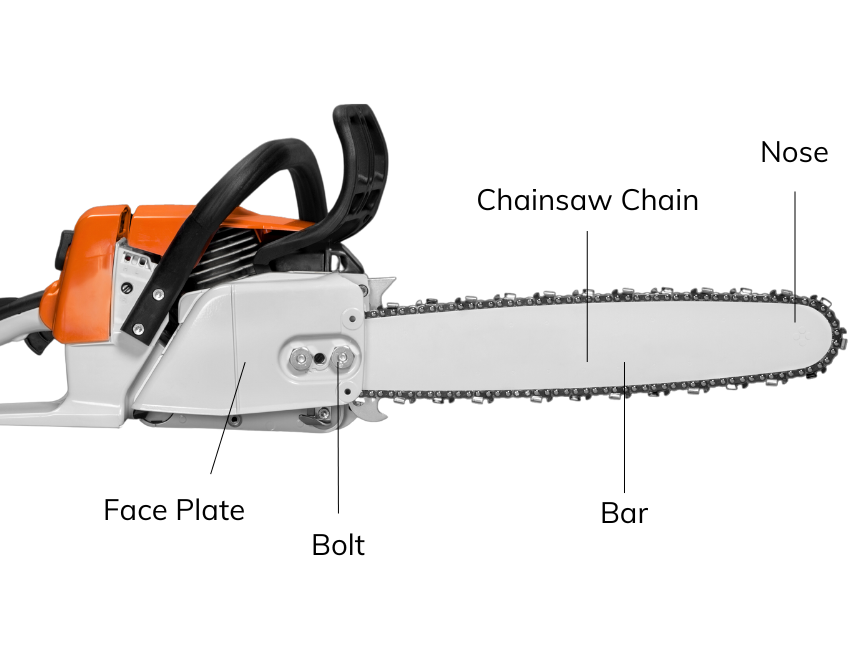
Step 1: Remove the Cover Plate (Face Plate, Clutch Cover)
To start, you need to take off the cover plate, also known as the face plate or the clutch cover. Most chainsaws will have one or two bolts holding the faceplate onto the chainsaw. Once the bolts are loose, engage the chain brake (hand guard) to disengage the chain.
Hold the chain bar with one hand to prevent it from falling. You should be able to pull off the face plate easily. The cover plate is typically covered with dirt and filth, and muck. If you want to, at this point you can clean off the cover plate.
Step 2: Pull In The Bar To Remove The Old Chain
Now that the cover plate is off, you can pull the chain bar slightly back toward the sprocket to create extra slack. At this point, the chain should be pretty loose anyways, but once you left the chain bar, it will be simple to pull off.
Remove the old chain and set it aside. You do not need to take off the chain bar to remove the chain (at least for all the models we use).
Note: The chain brake and hand guard are often used interchangeably. Most people actually call the handguard the chain brake, and that is because to activate the chain brake, you must engage the hand guard.
Step 3: Putting On The New Chain
Open up the new chain and hold it in your hands. Big thing here is to make sure the new chain is in the correct direction. Look for the really sharp, slanted edges on the cutting teeth. The cutting edge of the teeth is the edge that is angled. These need to be in the right direction facing forward over the bar.
Sometimes the chains can be all wrapped up in the bag so you'll need to straighten out the chain once you open it up. It can be frustrating so just do your best but again, make sure the sharp edges are facing forward.
Take the chain and start by putting it over the sprocket/clutch/drive end first. You should be able to wrap it around there to the front of the bar. It should match up and hug the sides of the bar. You can then push the bar back out to create tension on the bar, and so the chain snugs up nicely to the bar.
Once you have tension on the bar, manually make the blade move with your hand to make sure there are no hiccups on the line. Once it runs smoothly, you can proceed to putting the cover plate back onto the chainsaw. Again, make sure you put the chainsaw chain on in the correct direction.
Step 4: Putting The Clutch Cover Plate Back On
This will just be the reverse of the first step. Just put the cover plate back on and match it up to the screws. When you have the cover plate lined up, tighten the two screws to secure it in place. If the chain doesn't have the correct tension, the plate will likely not go back on right.
Did You Know? According to the CDC, approximately 36,000 chainsaw incidents occur each year. Make sure you follow the appropriate safety protocols and use the right PPE when using a chainsaw.
Step 5: Changing The Chainsaw Oil or Lube
Once you have the blade on and the cover plate secured in place, you want to check the lubricant levels of the machine. Now that you have a new chain on, this is the ideal time to change up the lubricant to make sure the blade runs smoothly.
Step 6: Greasing The Chainsaw Bar
This last step depends on the model of the chainsaw, but most models will have a little hole towards the front of the chainsaw. You can apply grease to this hole and manually move the chain along the chain bar to mix in and "grease" the chain.
Again, this ensures the chain runs smoothly and without any friction on the chain bar. There will typically be two holes on each side of the nose. Be sure to apply grease to both sides.
Sweet New Earth Final Say On Replacing A Chainsaw Chain
That's pretty much it! Changing a chainsaw chain is actually a fairly straightforward process. Be sure to wear gloves because, like we said, the new chainsaw chain is really sharp.
You don't want to cut yourself in the process of changing the chain. If you change the chainsaw chain wrong or have a loose chain you risk ruining the machine or injuring yourself so please take your time and do it right.
FAQs
Before you go...
We'll assume that you are changing a chainsaw chain you already have a chainsaw. But if not, we have an extensive list of some of the best chainsaws out there right now. Be sure to read our guide on the best chainsaws so you can see where your chainsaw model stacks up...
Related Articles:

Carl Anderson
Carl Anderson is an avid outdoorsman with a keen interest in writing about and reviewing tools. He has over 20 years of writing experience and the only time he isn't feverishly typing away at his computer is when he's outside in nature working on his projects. You can learn more about him here.
Join our community!
Join to receive guides, insights, and the latest gardening deals!